Руководство по работе с SD-картами на Arduino
Серия примеров чтения и записи данных на SD-карту с Arduino.
Автор: Arduino
Последнее обновление: 30.09.2025
Примечание
Эта статья была пересмотрена 18.11.2021 Карлом Сёдерби (Karl Söderby).
В этом руководстве собраны совместимые аппаратные средства и примеры кода, которые помогут вам начать работу с картами Secure Digital (SD).
Примеры в данном руководстве взяты из библиотеки SD, которая изначально основана на SdFat Уильяма Грейман (William Greiman).
Необходимое оборудование и программное обеспечение
*Список плат/шилдов со слотом для SD-карты приведён ниже:
Схема подключения
Ниже показан пример вставки SD-карты в плату MKR Zero. Ни один из приведённых ниже примеров не требует дополнительной схемы.
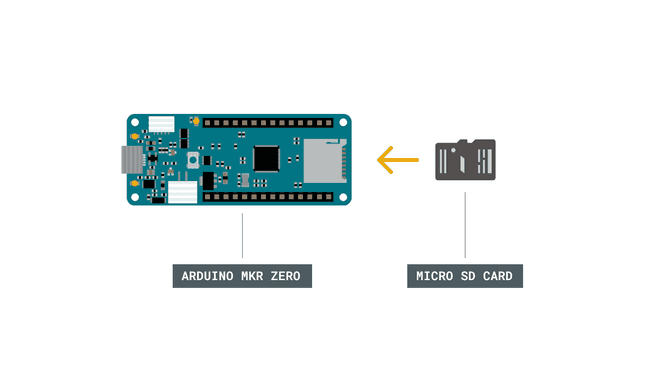
Вставьте SD-карту.
Примеры
Ниже приведена серия примеров.
Чтение и запись
Этот пример демонстрирует, как считывать данные с SD-карты и записывать их на неё.
В
setup()создайте новый файл с помощьюSD.open()с именем «test.txt».FILE_WRITEвключает доступ к файлу на чтение и запись, начиная с конца. Если файл"test.txt"уже находился на карте, он будет открыт.Назовите экземпляр открытого файла «myFile».
После открытия используйте
myFile.println()для записи строки на карту, завершив её символом возврата каретки. После записи содержимого закройте файл.Снова откройте файл с помощью
SD.open(). После открытия прочитайте содержимое файла с помощьюSD.read()и передайте его через последовательный порт. После прочтения всего содержимого закройте файл с помощьюSD.close().
Примечание
Обратите внимание: пин 4 — это пин Chip Select (CS) по умолчанию для большинства плат. Чтобы задать CS для MKR Zero, можно использовать 28 вместо 4, либо определение SDCARD_SS_PIN.
/*
  SD card read/write

  This example shows how to read and write data to and from an SD card file
  The circuit:
   SD card attached to SPI bus as follows:
 ** MOSI - pin 11
 ** MISO - pin 12
 ** CLK - pin 13
 ** CS - pin 4 (for MKRZero SD: SDCARD_SS_PIN)

  created   Nov 2010
  by David A. Mellis
  modified 9 Apr 2012
  by Tom Igoe

  This example code is in the public domain.

*/

#include <SPI.h>
#include <SD.h>

File myFile;

void setup() {
  // Open serial communications and wait for port to open:
  Serial.begin(9600);
  while (!Serial) {
    ; // wait for serial port to connect. Needed for native USB port only
  }

  Serial.print("Initializing SD card...");

  if (!SD.begin(4)) {
    Serial.println("initialization failed!");
    while (1);
  }
  Serial.println("initialization done.");

  // open the file. note that only one file can be open at a time,
  // so you have to close this one before opening another.
  myFile = SD.open("test.txt", FILE_WRITE);

  // if the file opened okay, write to it:
  if (myFile) {
    Serial.print("Writing to test.txt...");
    myFile.println("testing 1, 2, 3.");
    // close the file:
    myFile.close();
    Serial.println("done.");
  } else {
    // if the file didn't open, print an error:
    Serial.println("error opening test.txt");
  }

  // re-open the file for reading:
  myFile = SD.open("test.txt");
  if (myFile) {
    Serial.println("test.txt:");

    // read from the file until there's nothing else in it:
    while (myFile.available()) {
      Serial.write(myFile.read());
    }
    // close the file:
    myFile.close();
  } else {
    // if the file didn't open, print an error:
    Serial.println("error opening test.txt");
  }
}

void loop() {
  // nothing happens after setup
}
Информация о карте
Этот пример показывает, как считать информацию о SD-карте. Пример выводит тип тома, свободное пространство и другие сведения с помощью библиотеки SD, передавая их через последовательный порт.
/*

  SD card test

  This example shows how use the utility libraries on which the'

  SD library is based in order to get info about your SD card.

  Very useful for testing a card when you're not sure whether its working or not.

  Pin numbers reflect the default SPI pins for Uno and Nano models

  The circuit:

    SD card attached to SPI bus as follows:

 ** SDO - pin 11 on Arduino Uno/Duemilanove/Diecimila

 ** SDI - pin 12 on Arduino Uno/Duemilanove/Diecimila

 ** CLK - pin 13 on Arduino Uno/Duemilanove/Diecimila

 ** CS - depends on your SD card shield or module.

        Pin 10 used here for consistency with other Arduino examples

  created  28 Mar 2011

  by Limor Fried

  modified 24 July 2020

  by Tom Igoe

*/
// include the SD library:
#include <SPI.h>
#include <SD.h>

// set up variables using the SD utility library functions:

Sd2Card card;

SdVolume volume;

SdFile root;

// change this to match your SD shield or module;
// Default SPI on Uno and Nano: pin 10
// Arduino Ethernet shield: pin 4
// Adafruit® SD shields and modules: pin 10
// Sparkfun SD shield: pin 8
// MKRZero SD: SDCARD_SS_PIN

const int chipSelect = 10;

void setup() {

  // Open serial communications and wait for port to open:

  Serial.begin(9600);

  while (!Serial) {

    ; // wait for serial port to connect. Needed for native USB port only

  }

  Serial.print("\nInitializing SD card...");

  // we'll use the initialization code from the utility libraries

  // since we're just testing if the card is working!

  if (!card.init(SPI_HALF_SPEED, chipSelect)) {

    Serial.println("initialization failed. Things to check:");

    Serial.println("* is a card inserted?");

    Serial.println("* is your wiring correct?");

    Serial.println("* did you change the chipSelect pin to match your shield or module?");

    while (1);

  } else {

    Serial.println("Wiring is correct and a card is present.");

  }

  // print the type of card

  Serial.println();

  Serial.print("Card type:         ");

  switch (card.type()) {

    case SD_CARD_TYPE_SD1:

      Serial.println("SD1");

      break;

    case SD_CARD_TYPE_SD2:

      Serial.println("SD2");

      break;

    case SD_CARD_TYPE_SDHC:

      Serial.println("SDHC");

      break;

    default:

      Serial.println("Unknown");

  }

  // Now we will try to open the 'volume'/'partition' - it should be FAT16 or FAT32

  if (!volume.init(card)) {

    Serial.println("Could not find FAT16/FAT32 partition.\nMake sure you've formatted the card");

    while (1);

  }

  Serial.print("Clusters:          ");

  Serial.println(volume.clusterCount());

  Serial.print("Blocks x Cluster:  ");

  Serial.println(volume.blocksPerCluster());

  Serial.print("Total Blocks:      ");

  Serial.println(volume.blocksPerCluster() * volume.clusterCount());

  Serial.println();

  // print the type and size of the first FAT-type volume

  uint32_t volumesize;

  Serial.print("Volume type is:    FAT");

  Serial.println(volume.fatType(), DEC);

  volumesize = volume.blocksPerCluster();    // clusters are collections of blocks

  volumesize *= volume.clusterCount();       // we'll have a lot of clusters

  volumesize /= 2;                           // SD card blocks are always 512 bytes (2 blocks are 1KB)

  Serial.print("Volume size (Kb):  ");

  Serial.println(volumesize);

  Serial.print("Volume size (Mb):  ");

  volumesize /= 1024;

  Serial.println(volumesize);

  Serial.print("Volume size (Gb):  ");

  Serial.println((float)volumesize / 1024.0);

  Serial.println("\nFiles found on the card (name, date and size in bytes): ");

  root.openRoot(volume);

  // list all files in the card with date and size

  root.ls(LS_R | LS_DATE | LS_SIZE);

  root.close();
}

void loop(void) {
}
Примечание
Обратите внимание: размер кластера определяется пользователем во время форматирования и имеет некоторые значения по умолчанию, которые можно изменить согласно определённым правилам. В приведённом выше скетче используется размер блока по умолчанию, равный 512 байтам согласно стандартам. Это значение не является размером кластера — он вычисляется как количество блоков на кластер. Более подробную информацию о размерах кластеров можно найти в этой статье.
Вывод файла
Этот пример показывает, как прочитать файл с SD-карты с помощью библиотеки SD и передать его через последовательный порт.
На SD-карте находится файл с именем «datalog.txt». В loop() файл открывается при вызове SD.open(). Чтобы передать файл по последовательному порту на компьютер, используйте Serial.print(), считывая содержимое файла с помощью SD.read().
/*

  SD card file dump

  This example shows how to read a file from the SD card using the

  SD library and send it over the serial port.

  Pin numbers reflect the default SPI pins for Uno and Nano models.

  The circuit:

   SD card attached to SPI bus as follows:

 ** SDO - pin 11

 ** SDI - pin 12

 ** CLK - pin 13

 ** CS - depends on your SD card shield or module.

        Pin 10 used here for consistency with other Arduino examples

   (for MKRZero SD: SDCARD_SS_PIN)

  created  22 December 2010

  by Limor Fried

  modified 9 Apr 2012

  by Tom Igoe

  This example code is in the public domain.

*/
#include <SD.h>

const int chipSelect = 10;

void setup() {

  // Open serial communications and wait for port to open:

  Serial.begin(9600);

  // wait for Serial Monitor to connect. Needed for native USB port boards only:

  while (!Serial);

  Serial.print("Initializing SD card...");

  if (!SD.begin(chipSelect)) {

    Serial.println("initialization failed. Things to check:");

    Serial.println("1. is a card inserted?");

    Serial.println("2. is your wiring correct?");

    Serial.println("3. did you change the chipSelect pin to match your shield or module?");

    Serial.println("Note: press reset or reopen this serial monitor after fixing your issue!");

    while (true);

  }

  Serial.println("initialization done.");

  // open the file. note that only one file can be open at a time,

  // so you have to close this one before opening another.

  File dataFile = SD.open("datalog.txt");

  // if the file is available, write to it:

  if (dataFile) {

    while (dataFile.available()) {

      Serial.write(dataFile.read());

    }

    dataFile.close();

  }

  // if the file isn't open, pop up an error:

  else {

    Serial.println("error opening datalog.txt");

  }
}

void loop() {
}
Управление файлами
Этот пример показывает, как создать и удалить файл на SD-карте.
В setup() откройте новый файл с помощью SD.open() с именем «example.txt». FILE_WRITE включает доступ к файлу на чтение и запись, начиная с конца. В этом примере, однако, сразу же закройте файл, вызвав myFile.close().
После проверки наличия файла с помощью SD.exists() удалите файл с карты с помощью SD.remove.
/*

  SD card basic file example

  This example shows how to create and destroy an SD card file

  The circuit. Pin numbers reflect the default

  SPI pins for Uno and Nano models:

   SD card attached to SPI bus as follows:

 ** SDO - pin 11

 ** SDI - pin 12

 ** CLK - pin 13

 ** CS - depends on your SD card shield or module.

        Pin 10 used here for consistency with other Arduino examples

    (for MKRZero SD: SDCARD_SS_PIN)

  created   Nov 2010

  by David A. Mellis

  modified 24 July 2020

  by Tom Igoe

  This example code is in the public domain.

*/
#include <SD.h>

const int chipSelect = 10;

File myFile;

void setup() {

  // Open serial communications and wait for port to open:

  Serial.begin(9600);

  // wait for Serial Monitor to connect. Needed for native USB port boards only:
  while (!Serial);

  Serial.print("Initializing SD card...");

  if (!SD.begin(10)) {

    Serial.println("initialization failed!");

    while (1);

  }

  Serial.println("initialization done.");

  if (SD.exists("example.txt")) {

    Serial.println("example.txt exists.");

  } else {

    Serial.println("example.txt doesn't exist.");

  }

  // open a new file and immediately close it:

  Serial.println("Creating example.txt...");

  myFile = SD.open("example.txt", FILE_WRITE);

  myFile.close();

  // Check to see if the file exists:

  if (SD.exists("example.txt")) {

    Serial.println("example.txt exists.");

  } else {

    Serial.println("example.txt doesn't exist.");

  }

  // delete the file:

  Serial.println("Removing example.txt...");

  SD.remove("example.txt");

  if (SD.exists("example.txt")) {

    Serial.println("example.txt exists.");

  } else {

    Serial.println("example.txt doesn't exist.");

  }
}

void loop() {

  // nothing happens after setup finishes.
}
Вывод списка файлов
Этот пример показывает, как вывести список файлов, доступных в директории SD-карты.
Основной loop() ничего не делает, поскольку функция, выводящая файловый каталог «/» SD-карты, вызывается из setup(). Это сделано потому, что нам нужно увидеть его только один раз.
Функция printDirectory просматривает список записей и выводит в последовательный порт каждый файл и директорию. Для файлов также выводится их размер.
/*

  Listfiles

  This example shows how print out the files in a

  directory on a SD card. Pin numbers reflect the default

  SPI pins for Uno and Nano models

  The circuit:

   SD card attached to SPI bus as follows:

 ** SDO - pin 11

 ** SDI - pin 12

 ** CLK - pin 13

 ** CS - depends on your SD card shield or module.

        Pin 10 used here for consistency with other Arduino examples

    (for MKRZero SD: SDCARD_SS_PIN)

  created   Nov 2010

  by David A. Mellis

  modified 9 Apr 2012

  by Tom Igoe

  modified 2 Feb 2014

  by Scott Fitzgerald

  modified 24 July 2020

  by Tom Igoe

  This example code is in the public domain.

*/
#include <SD.h>

const int chipSelect = 10;

File root;

void setup() {

 // Open serial communications and wait for port to open:

  Serial.begin(9600);

  // wait for Serial Monitor to connect. Needed for native USB port boards only:

  while (!Serial);

  Serial.print("Initializing SD card...");

  if (!SD.begin(chipSelect)) {

    Serial.println("initialization failed. Things to check:");

    Serial.println("1. is a card inserted?");

    Serial.println("2. is your wiring correct?");

    Serial.println("3. did you change the chipSelect pin to match your shield or module?");

    Serial.println("Note: press reset or reopen this serial monitor after fixing your issue!");

    while (true);

  }

  Serial.println("initialization done.");

  root = SD.open("/");

  printDirectory(root, 0);

  Serial.println("done!");
}

void loop() {

  // nothing happens after setup finishes.
}

void printDirectory(File dir, int numTabs) {

  while (true) {

    File entry =  dir.openNextFile();

    if (! entry) {

      // no more files

      break;

    }

    for (uint8_t i = 0; i < numTabs; i++) {

      Serial.print('\t');

    }

    Serial.print(entry.name());

    if (entry.isDirectory()) {

      Serial.println("/");

      printDirectory(entry, numTabs + 1);

    } else {

      // files have sizes, directories do not

      Serial.print("\t\t");

      Serial.println(entry.size(), DEC);

    }

    entry.close();

  }
}